> ## Documentation Index
> Fetch the complete documentation index at: https://help.clueso.io/llms.txt
> Use this file to discover all available pages before exploring further.
# Video basics
> Create your first video in Clueso
In this guide, you’ll learn how to take a rough screen recording and turn it into a polished, studio-quality video using Clueso.
From the [home screen](https://web.clueso.io), start by recording your screen, uploading a video, or importing a slide deck.
Once the processing is complete, Clueso will take you to the video editor with a first draft of your video. At this stage, your video will still play with its original audio.
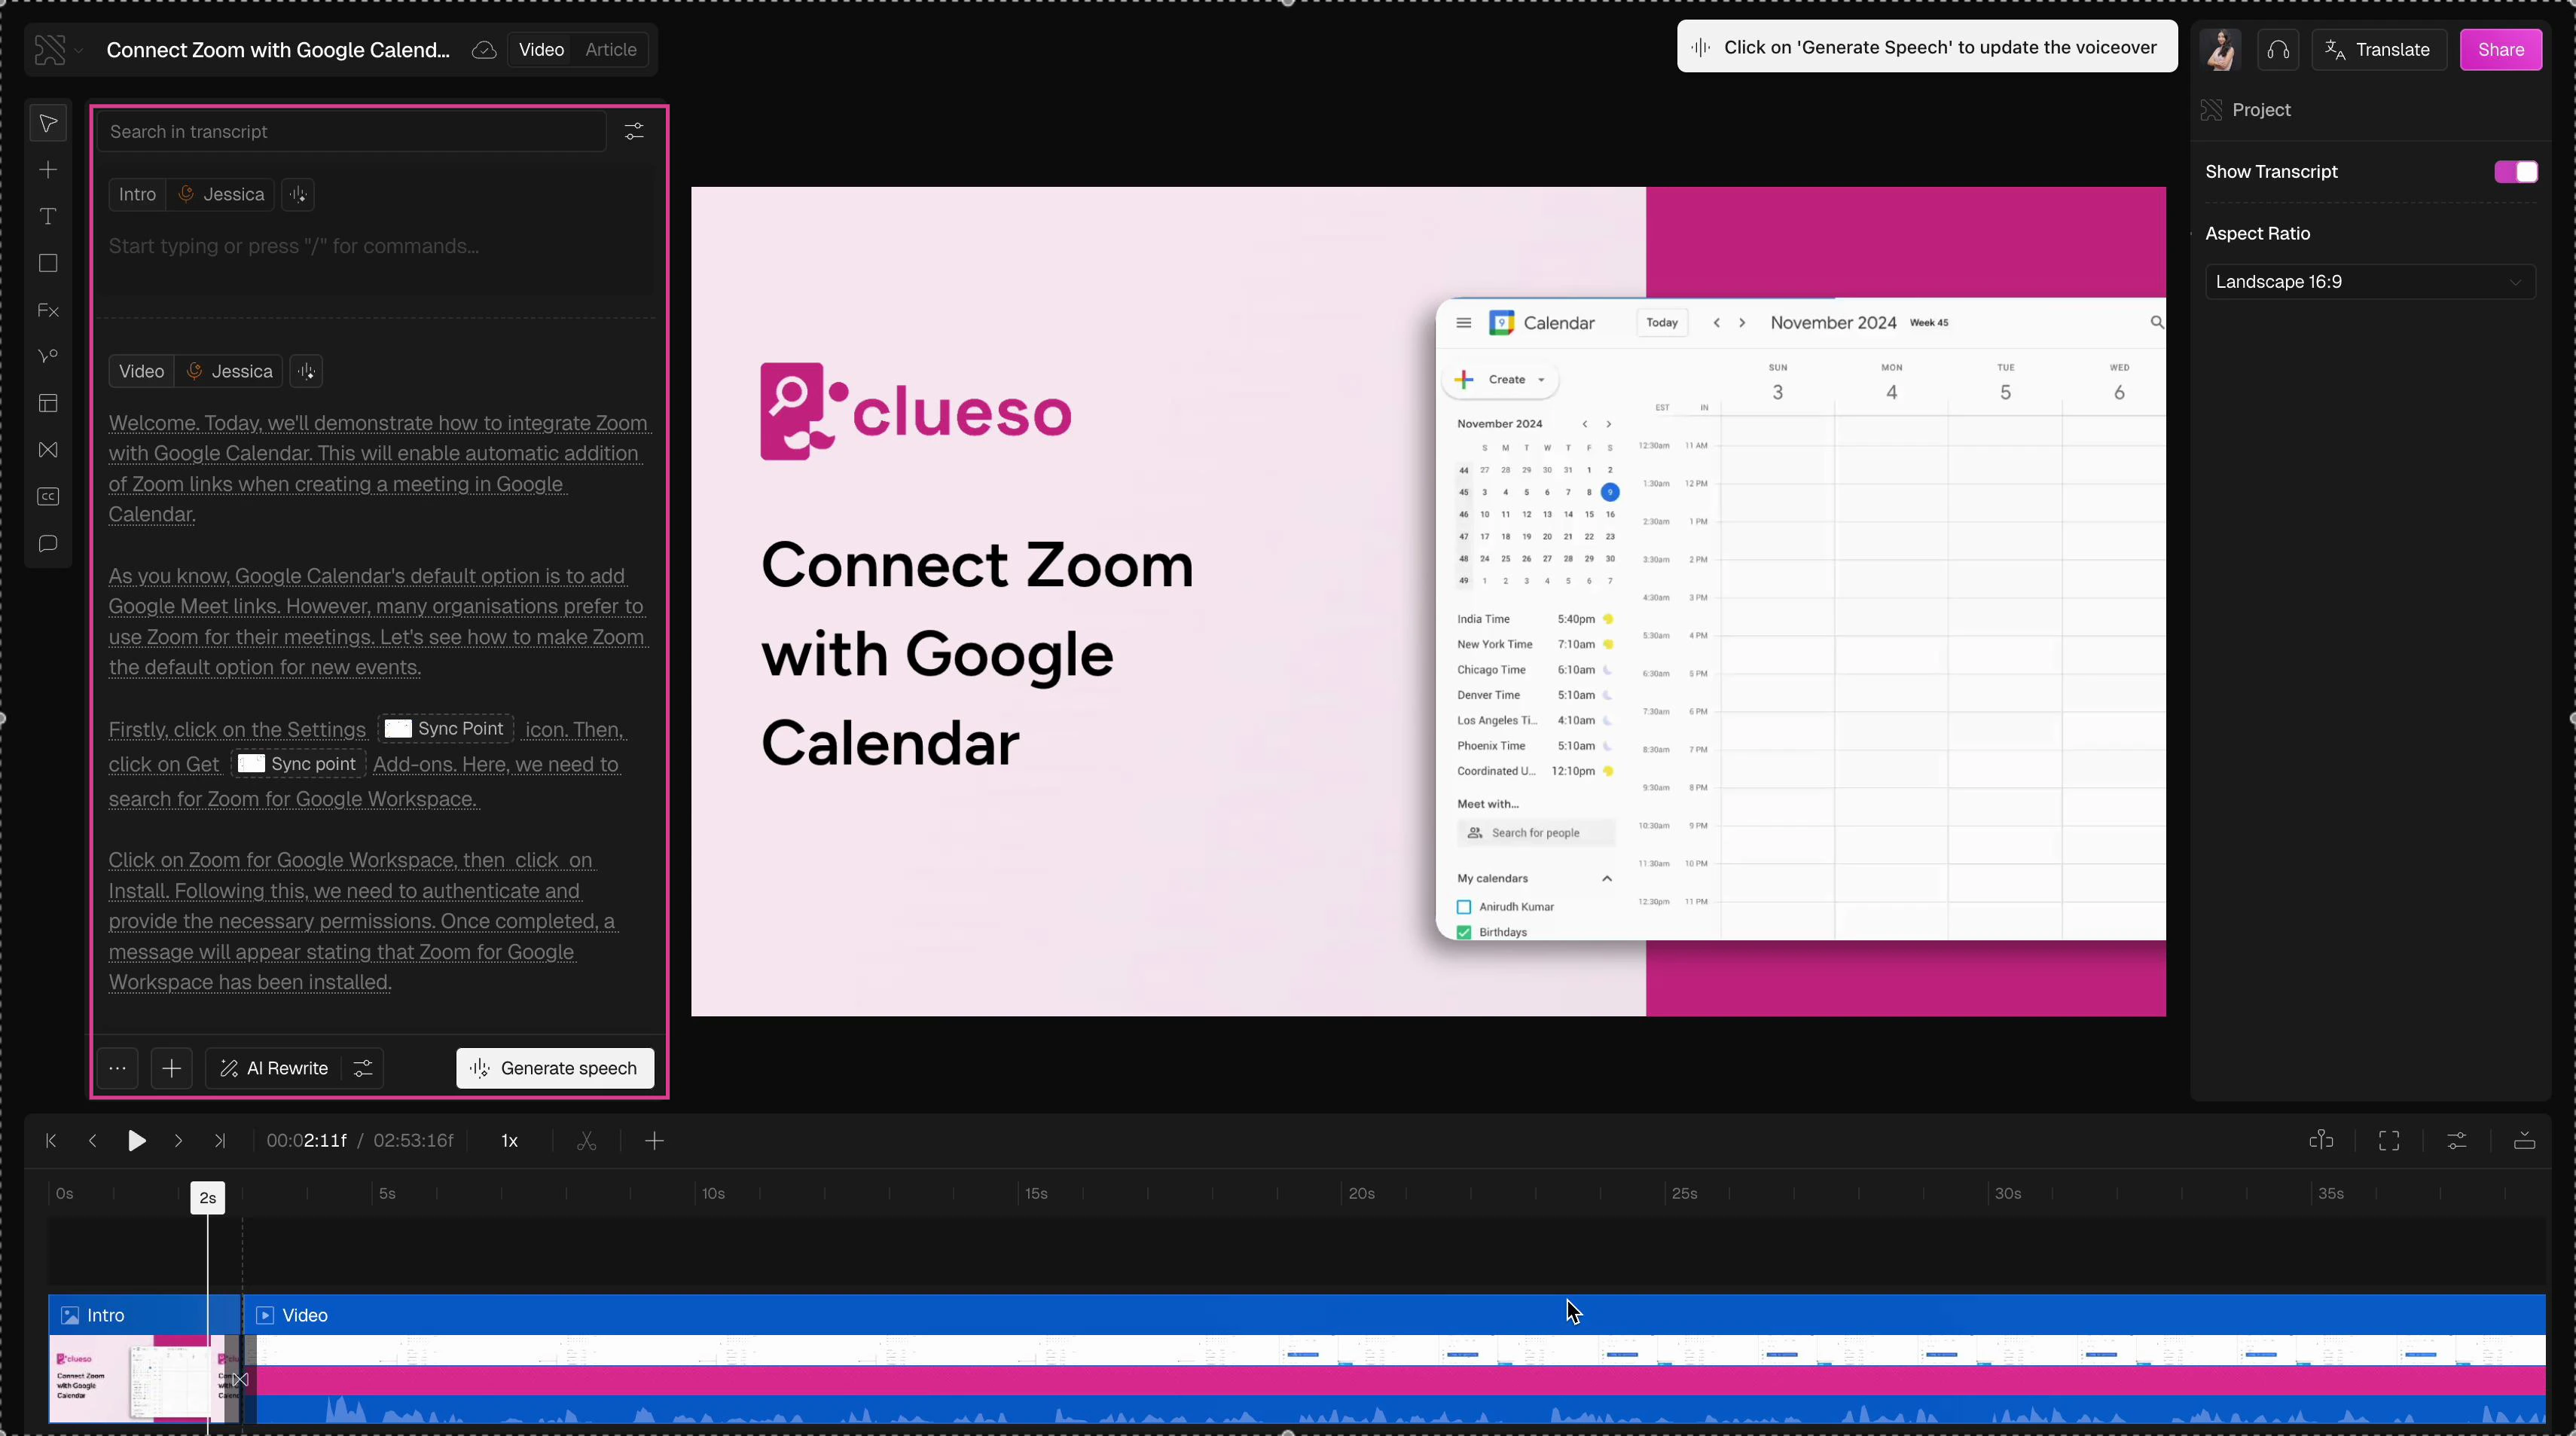
 * On the left-hand panel, you’ll see the script Clueso generated based on your recording.
* You can freely **edit this script**, add new sentences, fix mistakes, or rewrite sections.
* Any changes you make to the script will be reflected in the AI voiceover once you hit **Generate Speech**.
This means you don’t need to re-record your video just because you missed a point or stumbled during recording.
* On the left-hand panel, you’ll see the script Clueso generated based on your recording.
* You can freely **edit this script**, add new sentences, fix mistakes, or rewrite sections.
* Any changes you make to the script will be reflected in the AI voiceover once you hit **Generate Speech**.
This means you don’t need to re-record your video just because you missed a point or stumbled during recording.
 In Clueso, **sync points** make sure your voiceover stays perfectly aligned with your video.
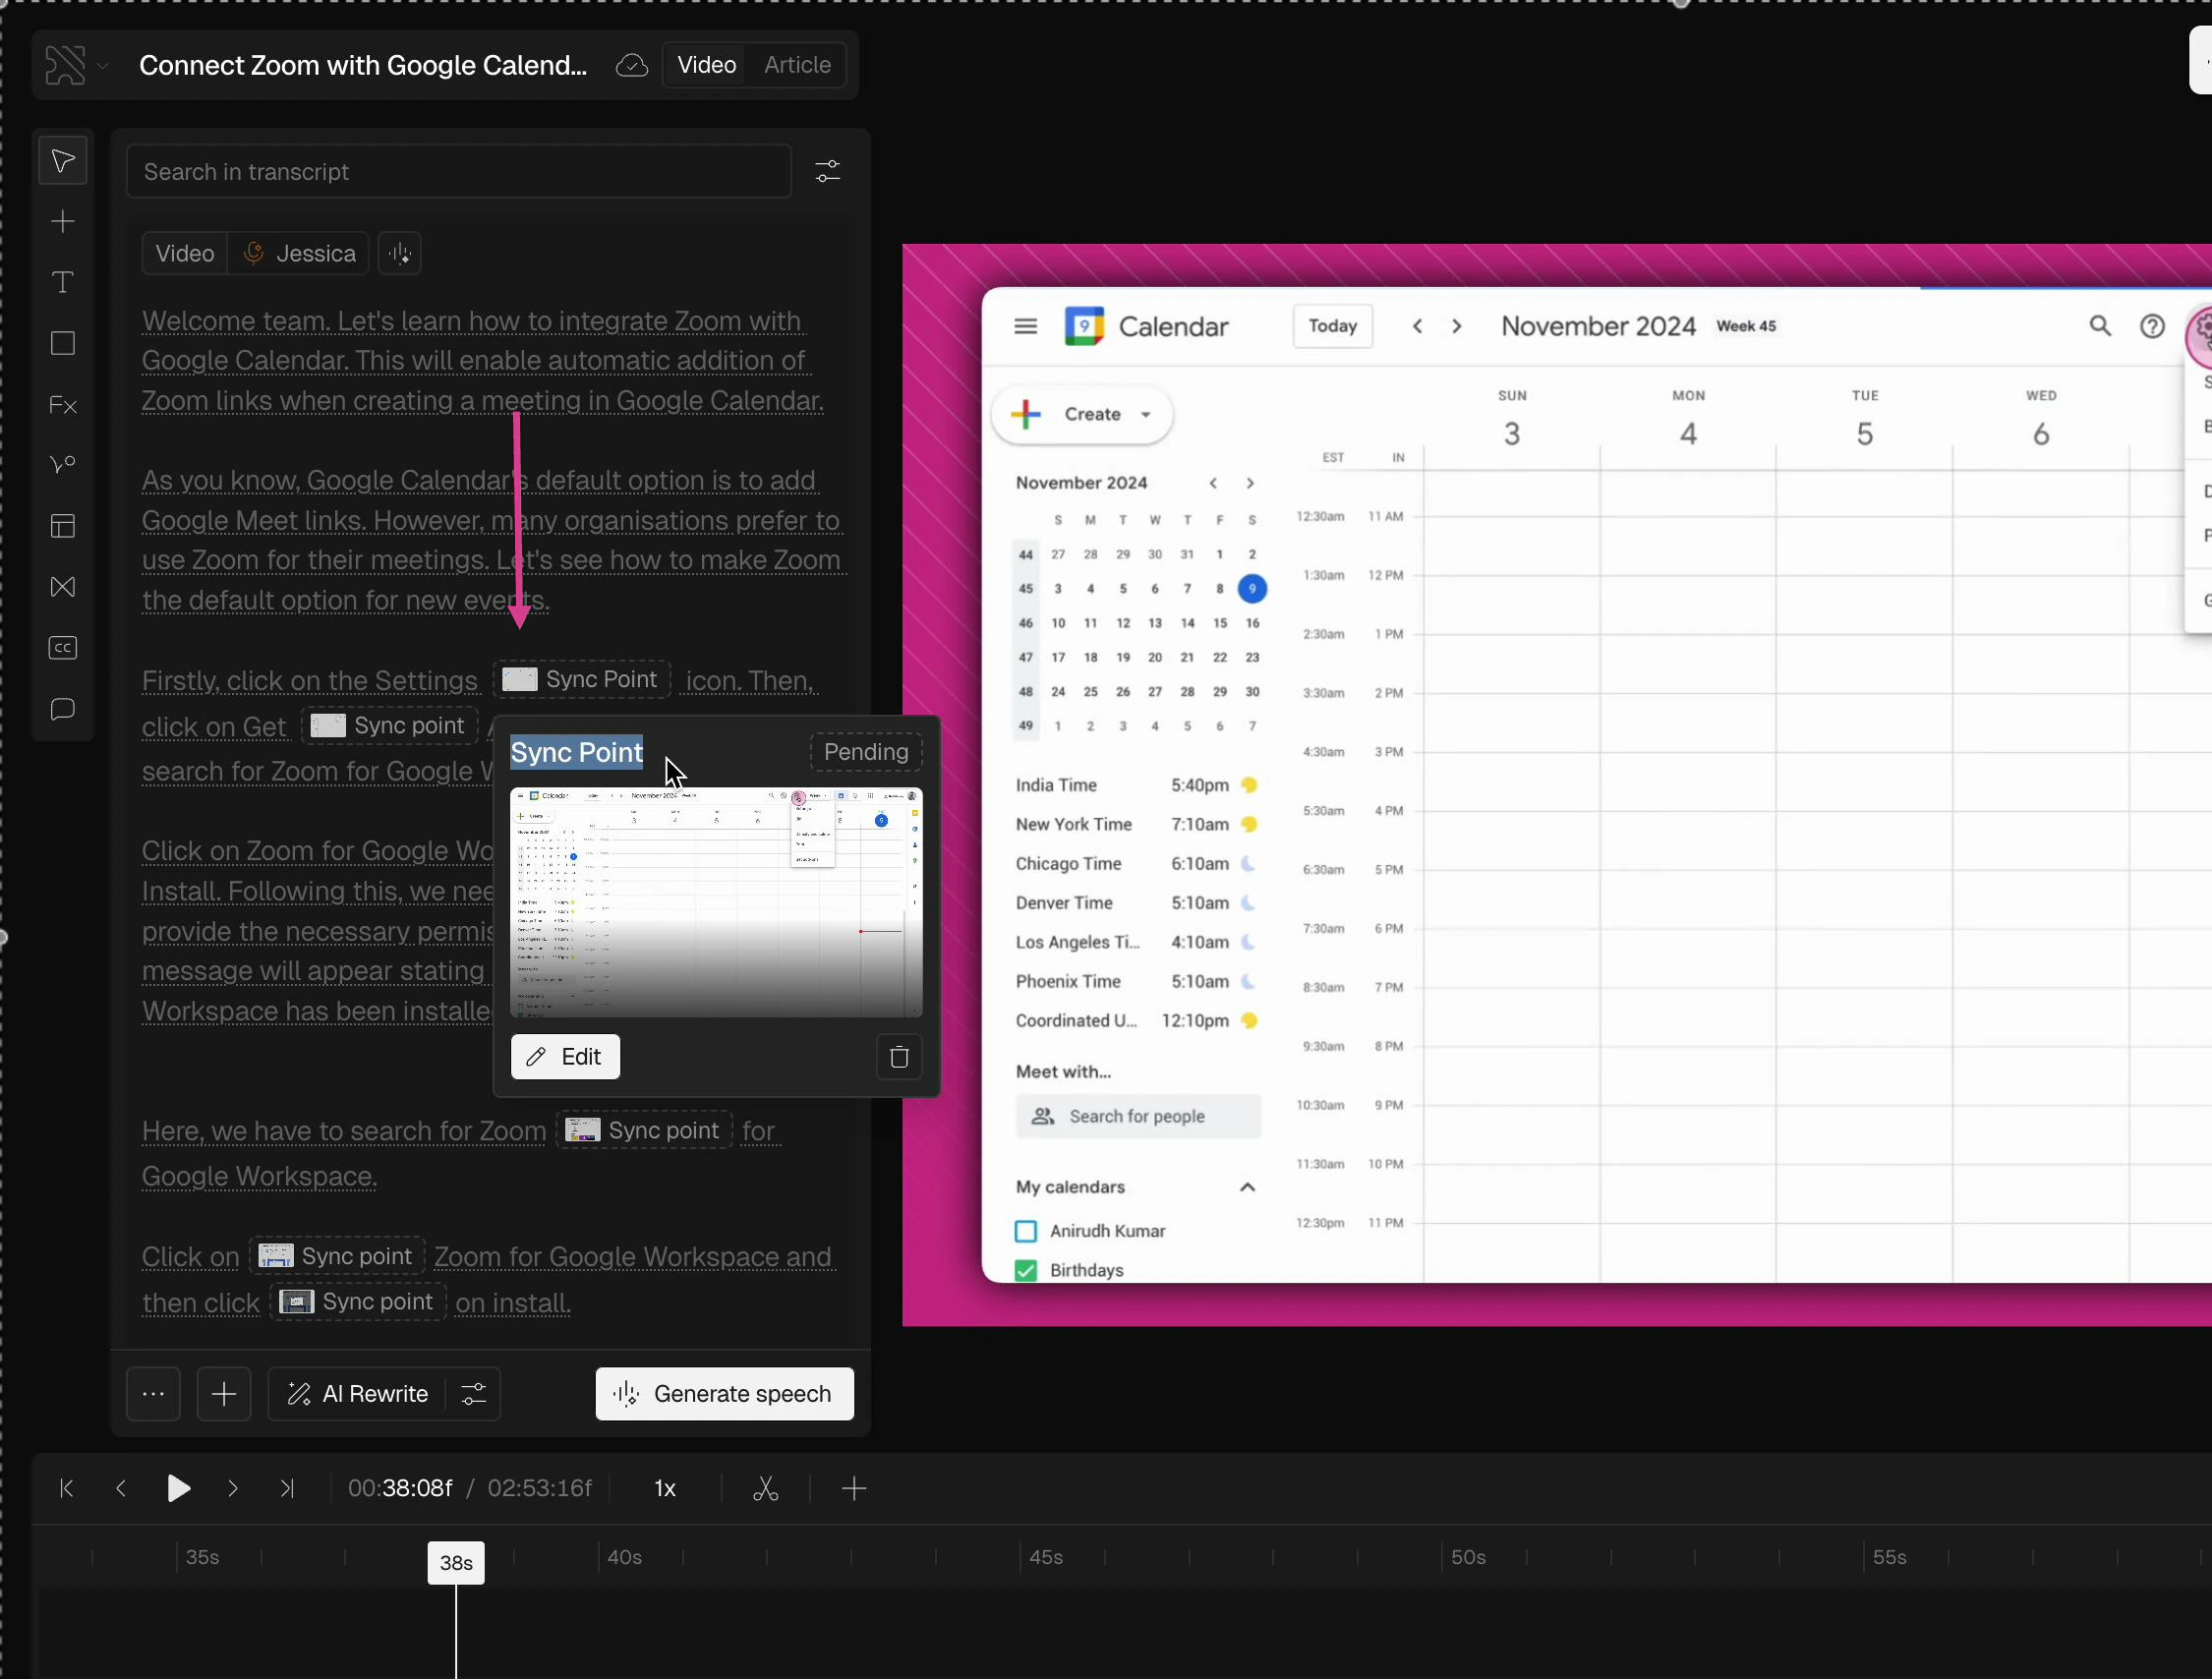 When you click a sync point, you’ll see the frame from the video that plays at that point in the script.
Clueso automatically creates these sync points, linking your script directly to the right frames in your video.
Take a moment to review all your sync points. Clueso places them intelligently throughout your script, but if one looks off or is missing, you can always add or edit a sync point.
**Further reading:** To learn more about how to work with sync points in your script and ensure sync between the voiceover and video, check out [this guide](/sync-points/sync-point-basics/add-sync-points).
* Click on the name of the voice, then **Change Voice** to browse Clueso’s AI voice library.
* You’ll find a variety of voices in different accents.
* Use the **Accents** dropdown to filter options and pick the one you like best.
When you click a sync point, you’ll see the frame from the video that plays at that point in the script.
Clueso automatically creates these sync points, linking your script directly to the right frames in your video.
Take a moment to review all your sync points. Clueso places them intelligently throughout your script, but if one looks off or is missing, you can always add or edit a sync point.
**Further reading:** To learn more about how to work with sync points in your script and ensure sync between the voiceover and video, check out [this guide](/sync-points/sync-point-basics/add-sync-points).
* Click on the name of the voice, then **Change Voice** to browse Clueso’s AI voice library.
* You’ll find a variety of voices in different accents.
* Use the **Accents** dropdown to filter options and pick the one you like best.
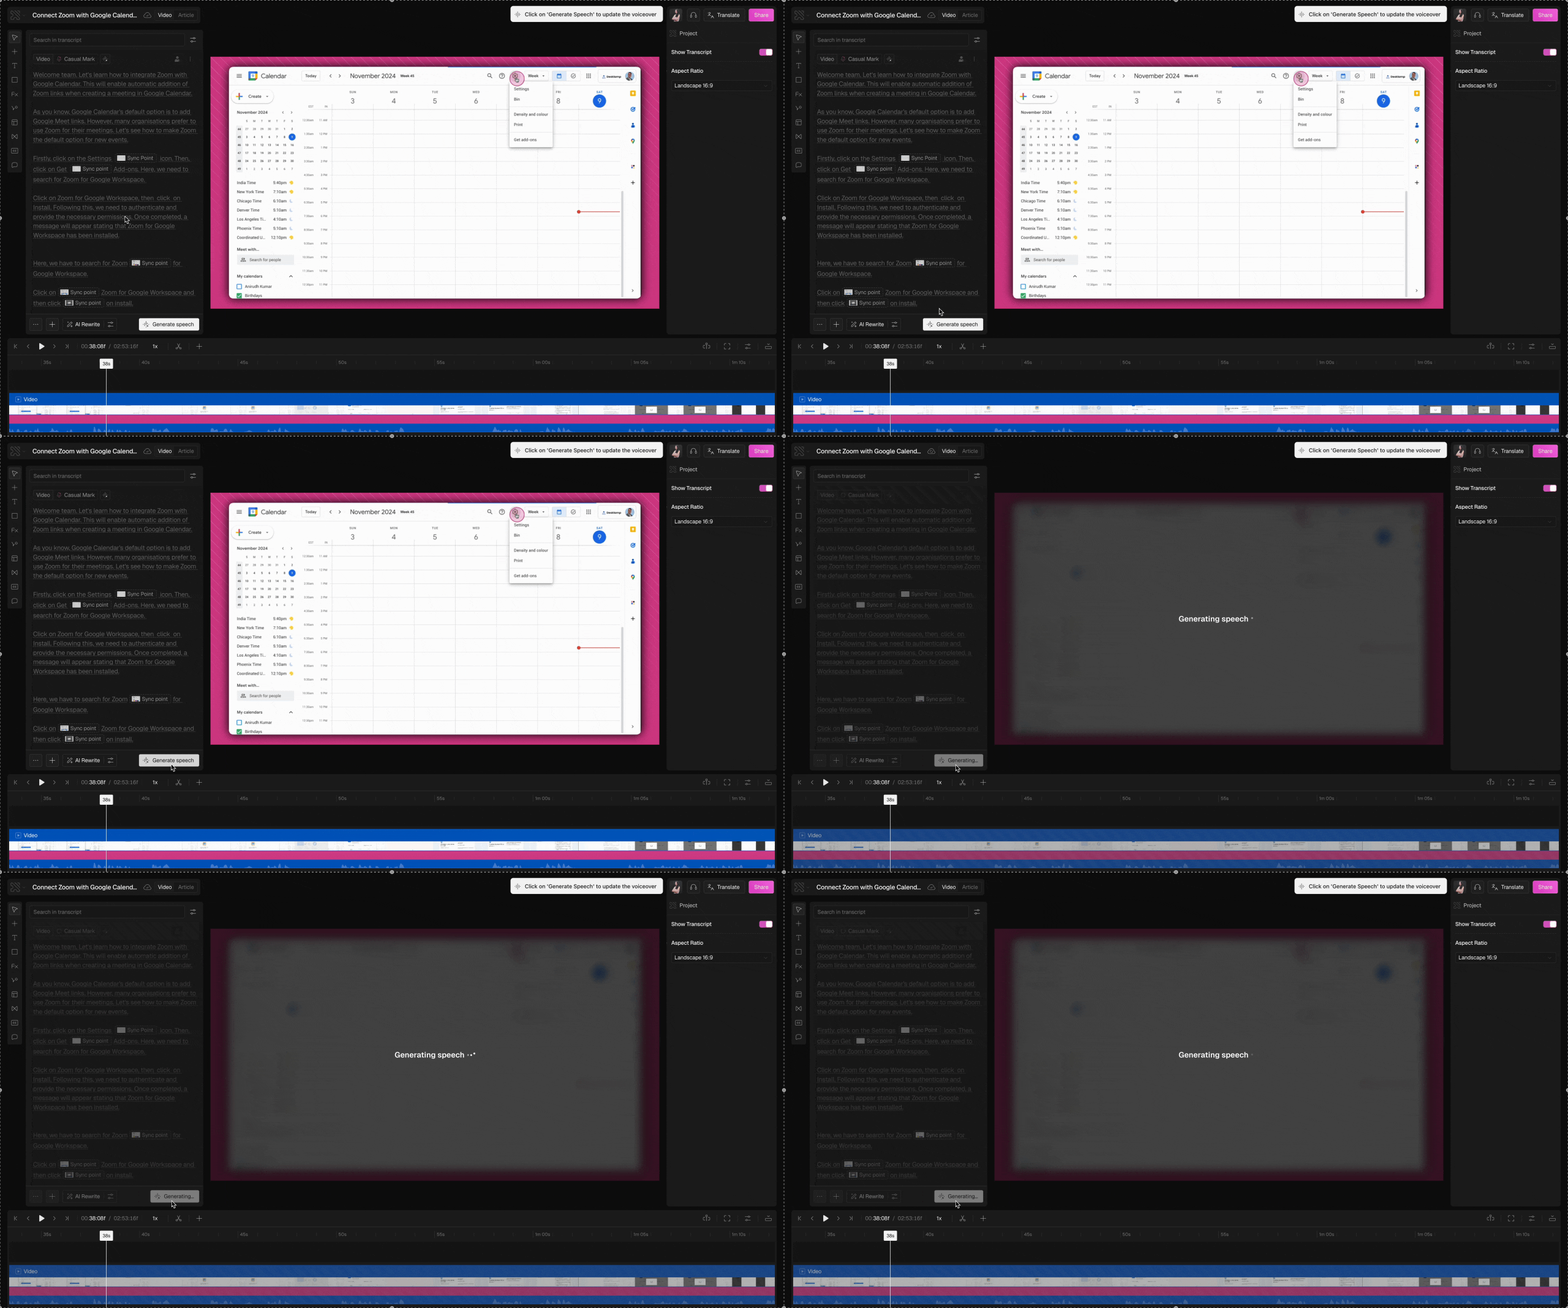
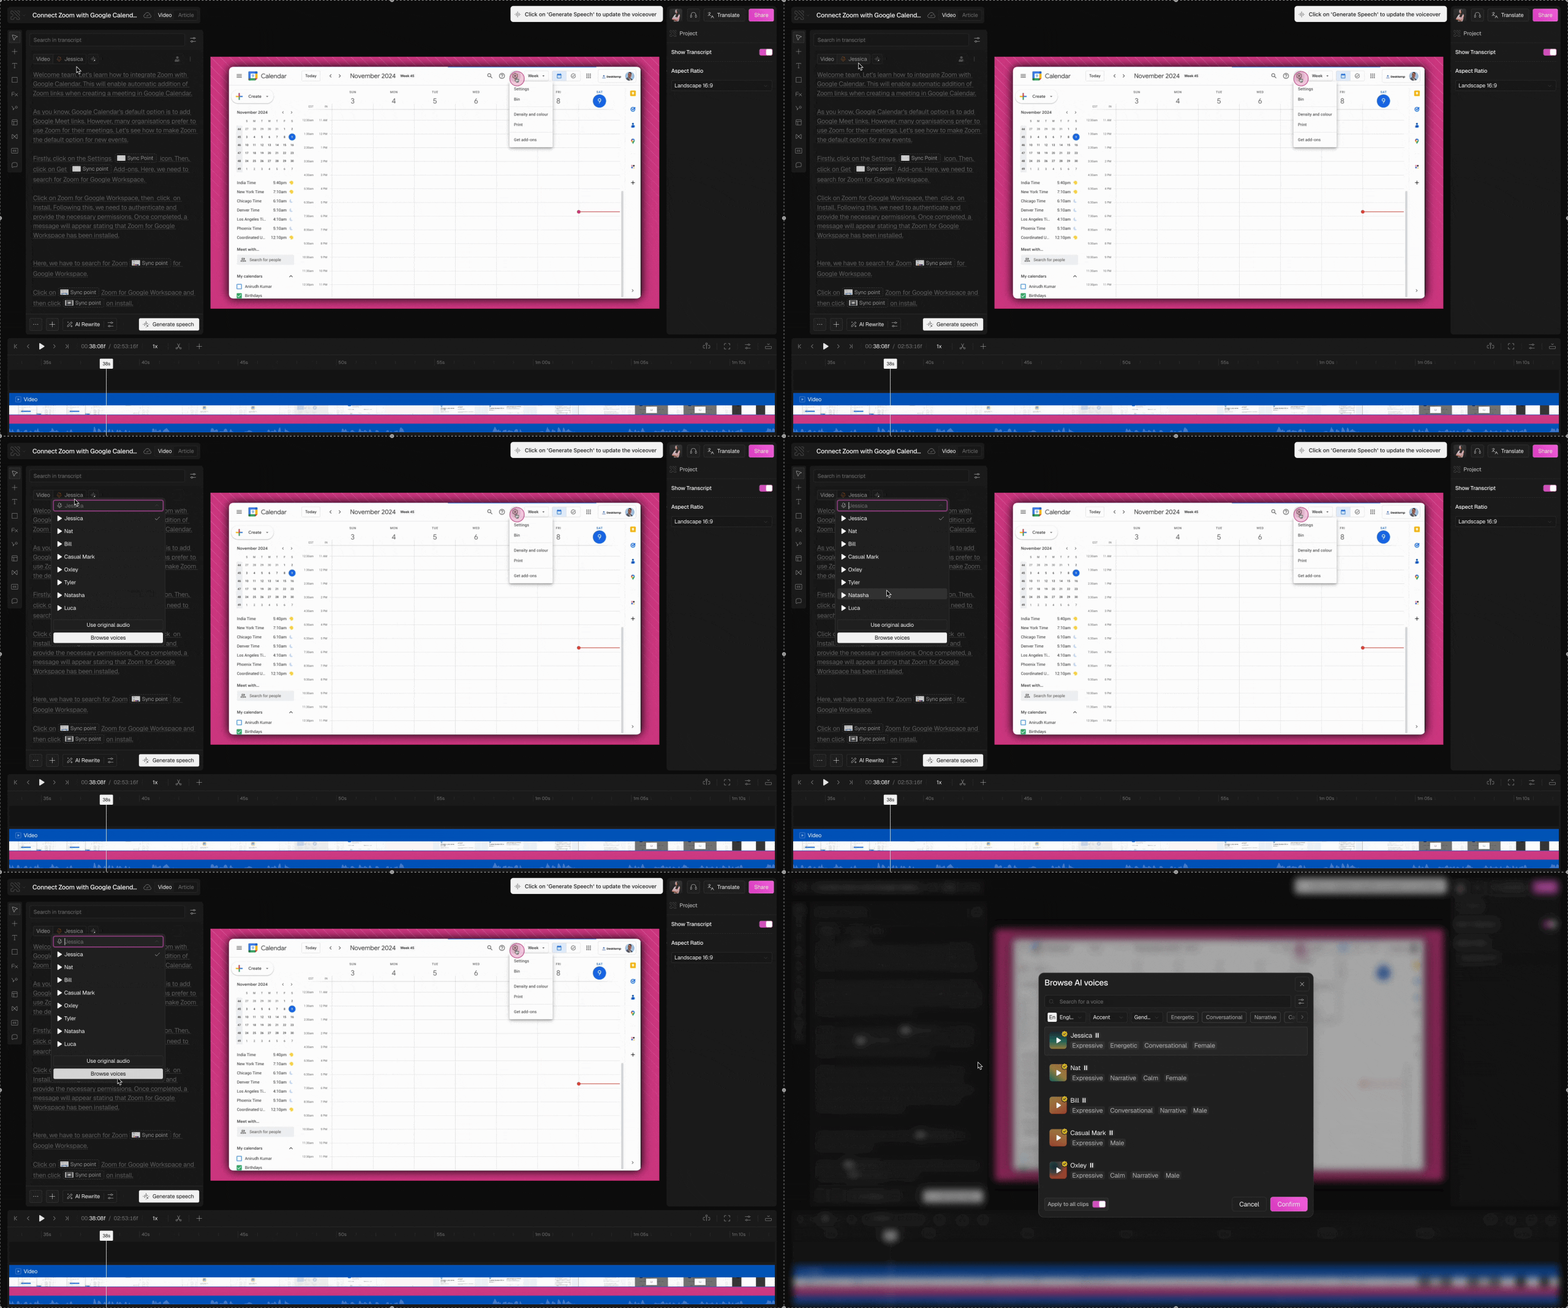 * After picking a voice, click on **Generate Speech**.
* Clueso will replace your original audio with the AI voiceover, perfectly synced to your updated script.
* Once generation is complete, play the video to review the new version.
* After picking a voice, click on **Generate Speech**.
* Clueso will replace your original audio with the AI voiceover, perfectly synced to your updated script.
* Once generation is complete, play the video to review the new version.
 From the **Elements** tab on the left, insert highlights, callouts, or effects to make your video more engaging.
Play through the final version of your video to make sure everything looks and sounds exactly the way you want.
And that's it! 🎉 You've successfully transformed a rough screen recording into a professional studio-quality video.
From the **Elements** tab on the left, insert highlights, callouts, or effects to make your video more engaging.
Play through the final version of your video to make sure everything looks and sounds exactly the way you want.
And that's it! 🎉 You've successfully transformed a rough screen recording into a professional studio-quality video.