> ## Documentation Index
> Fetch the complete documentation index at: https://help.clueso.io/llms.txt
> Use this file to discover all available pages before exploring further.
# Rectangle
> Learn how to add and customize rectangle elements to create shapes and highlights in your videos
Rectangle elements allow you to add geometric shapes to your videos, useful for creating backgrounds, highlights, or visual separators.
## Adding a Rectangle
There are two ways to add a rectangle in Clueso.
### Using the Shapes tool
Navigate to the **Shapes** tool on the left panel.
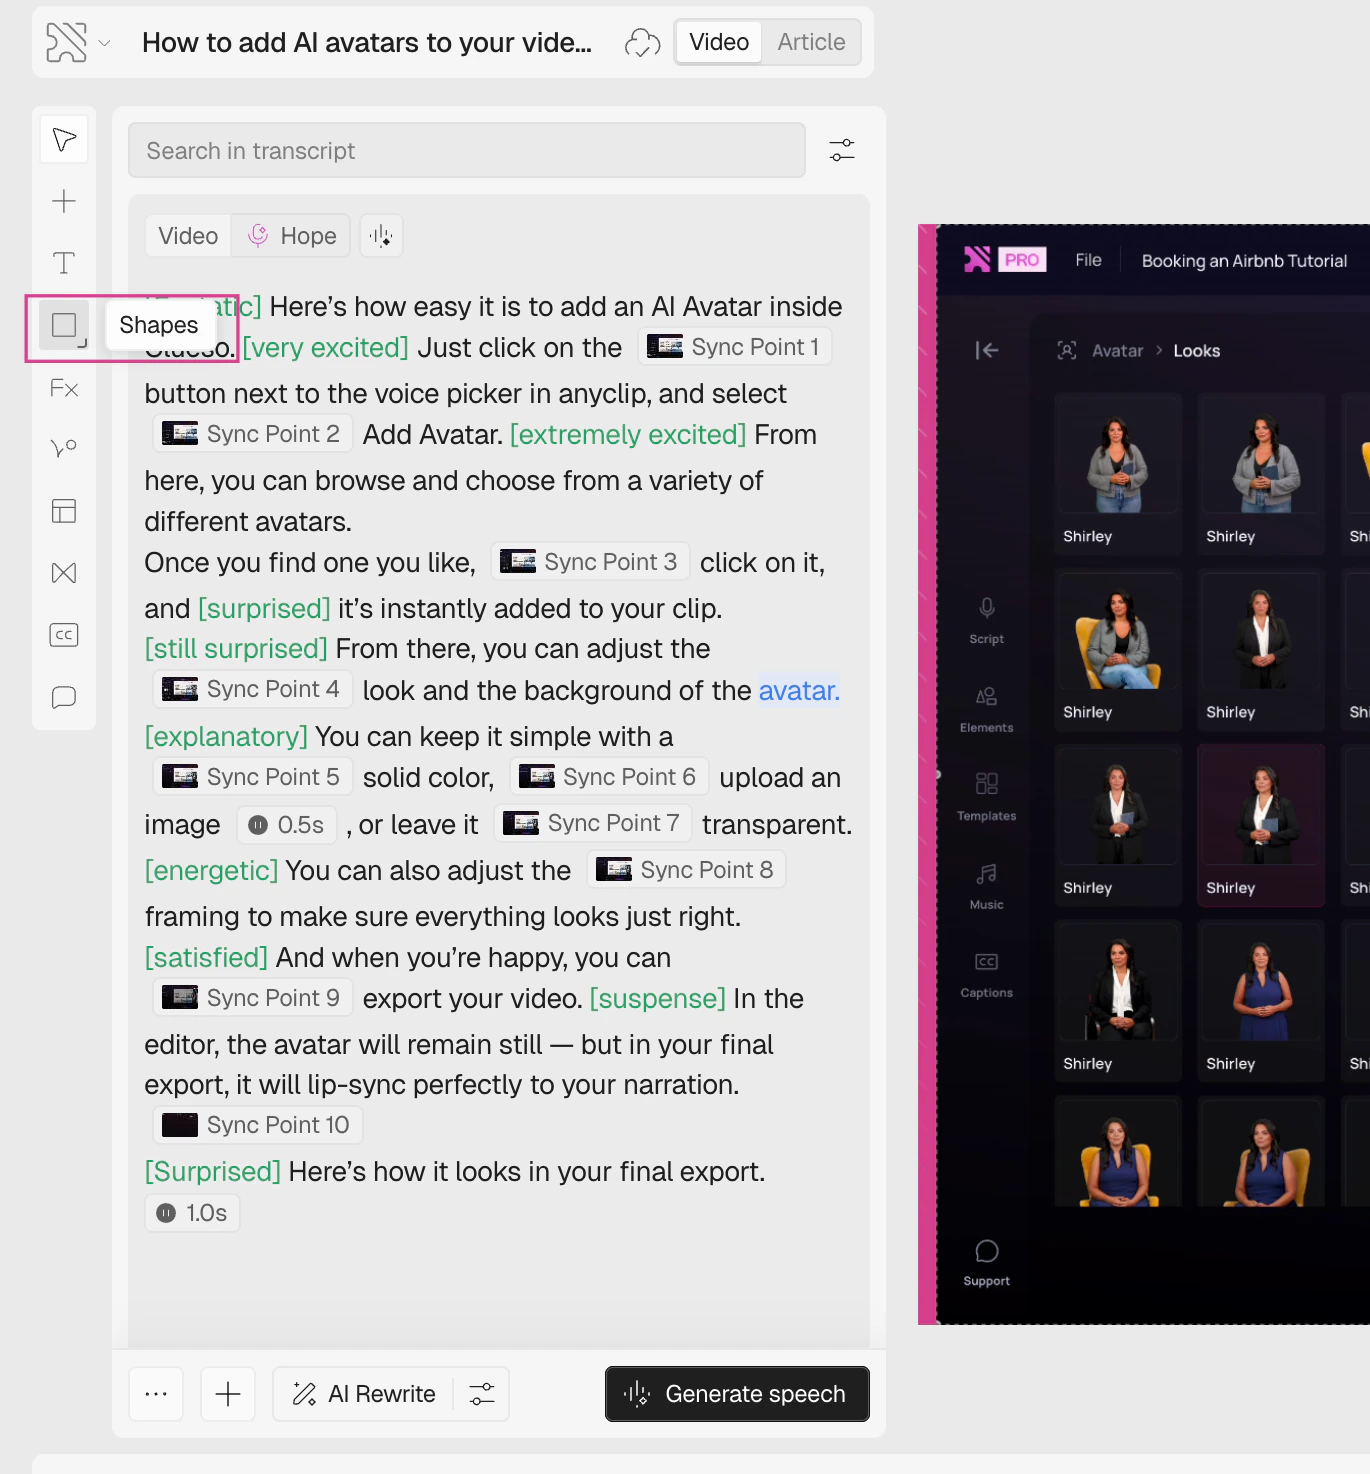 Click on **Rectangle** — it is active by default when you open the Shapes tool. Your cursor will update to confirm the tool is selected.
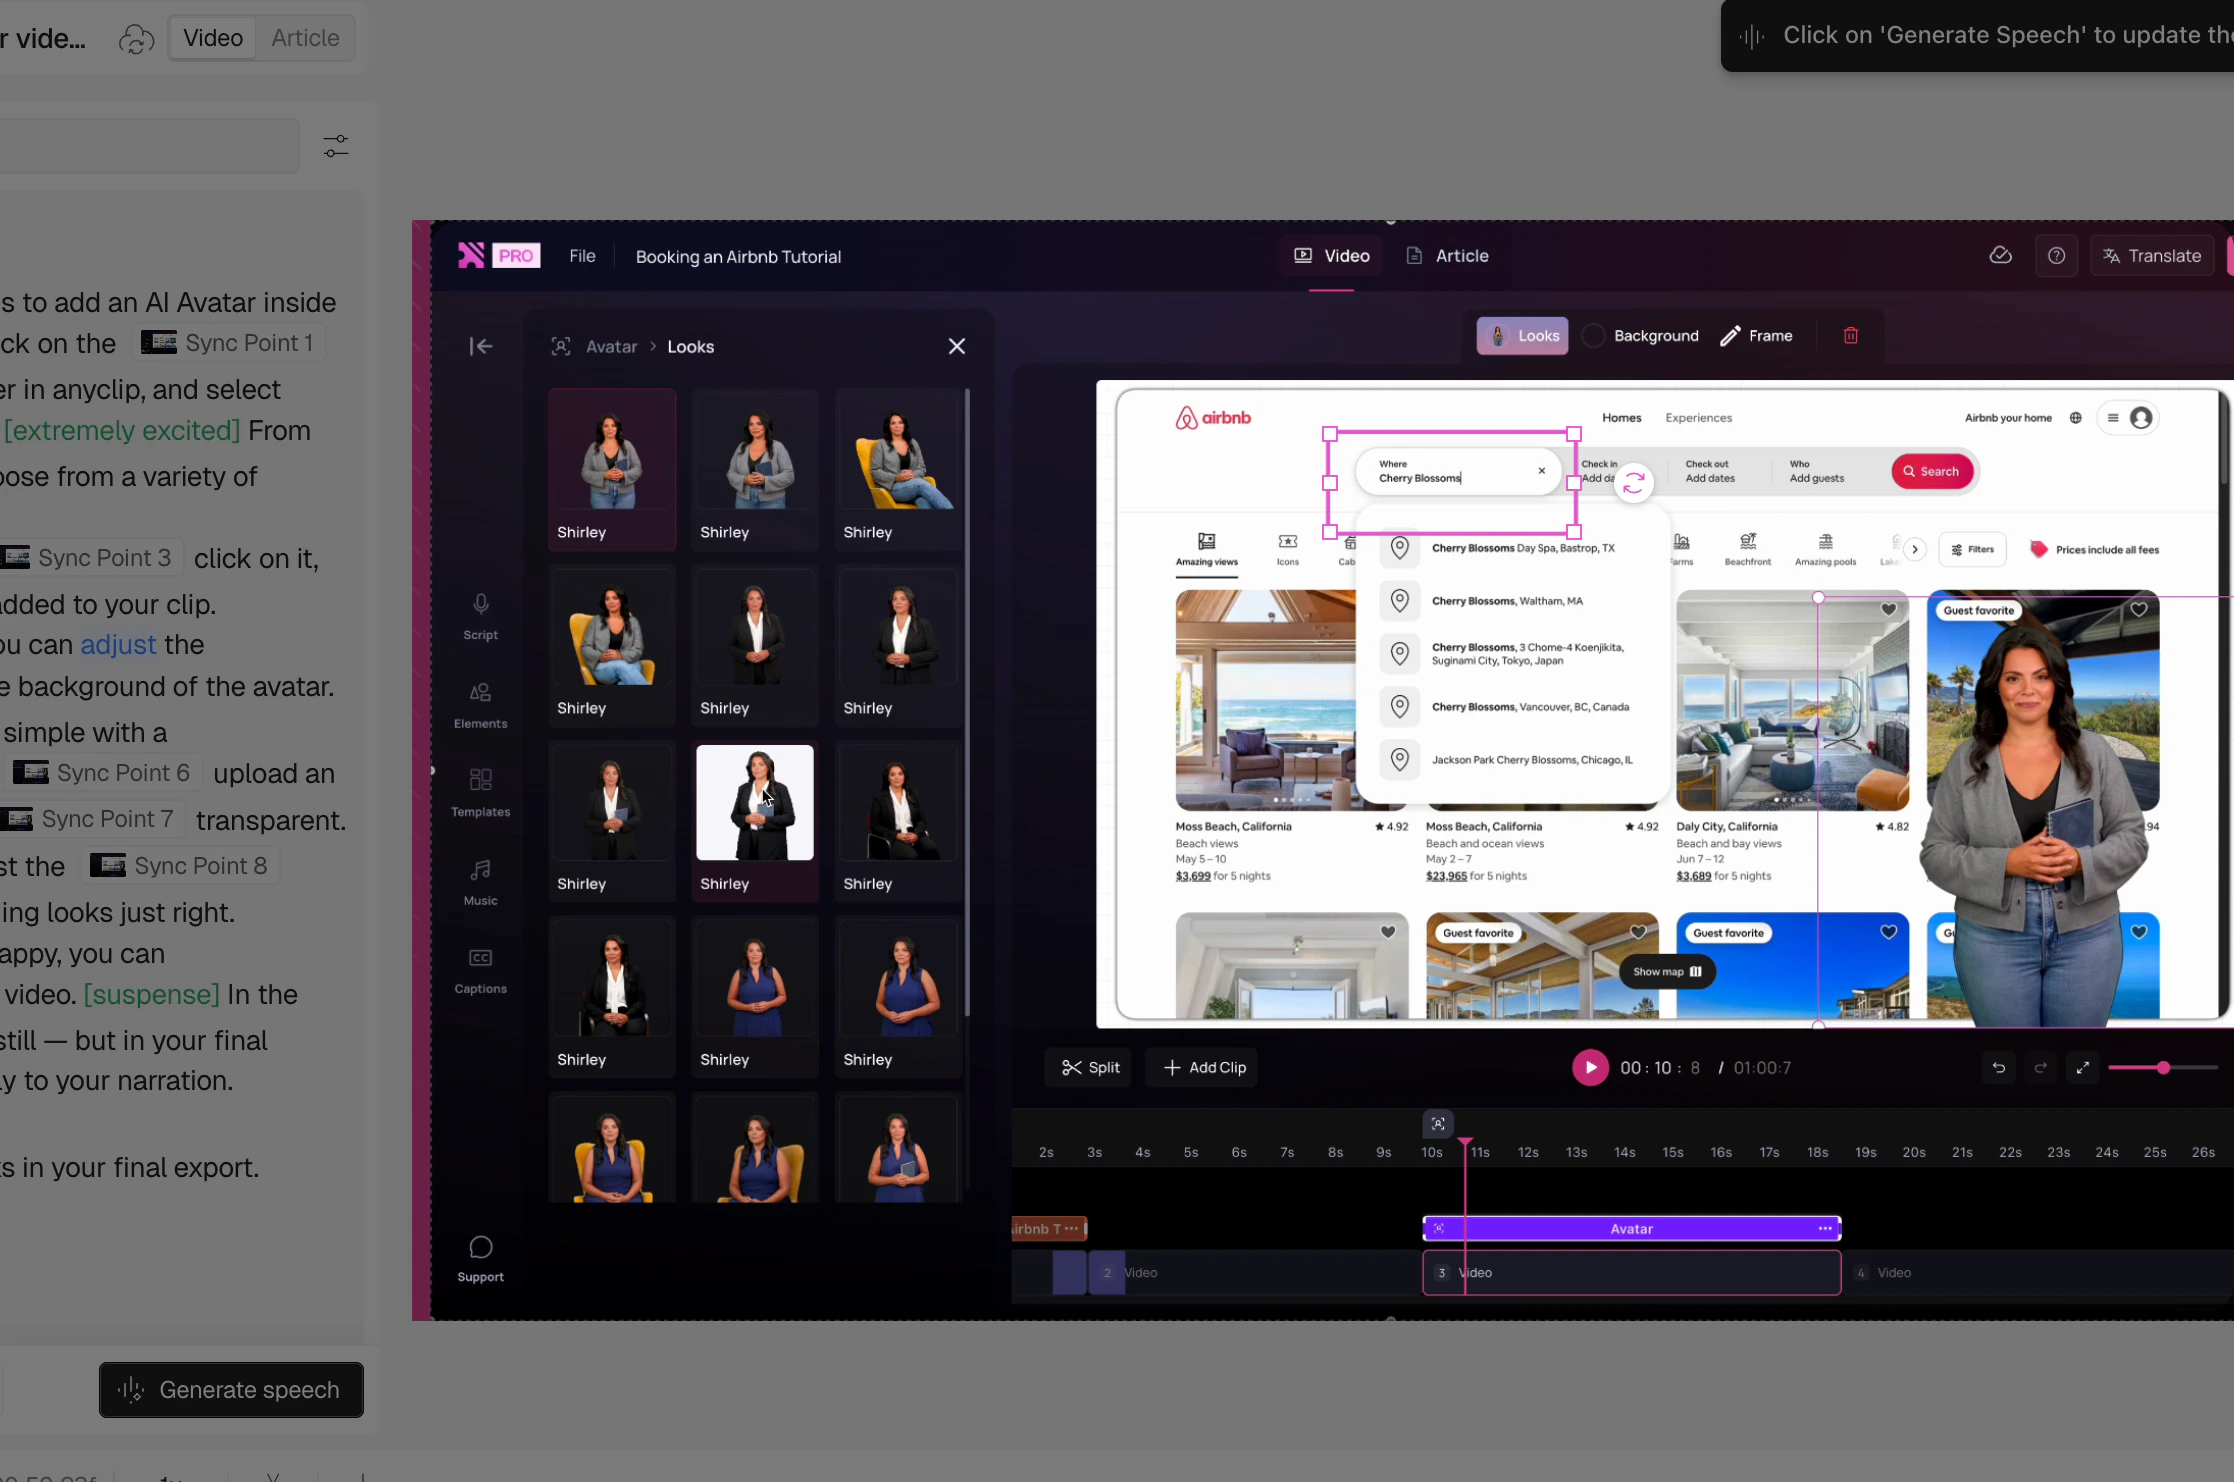
 Click and drag on the canvas to draw your rectangle.
 ### Using the keyboard shortcut
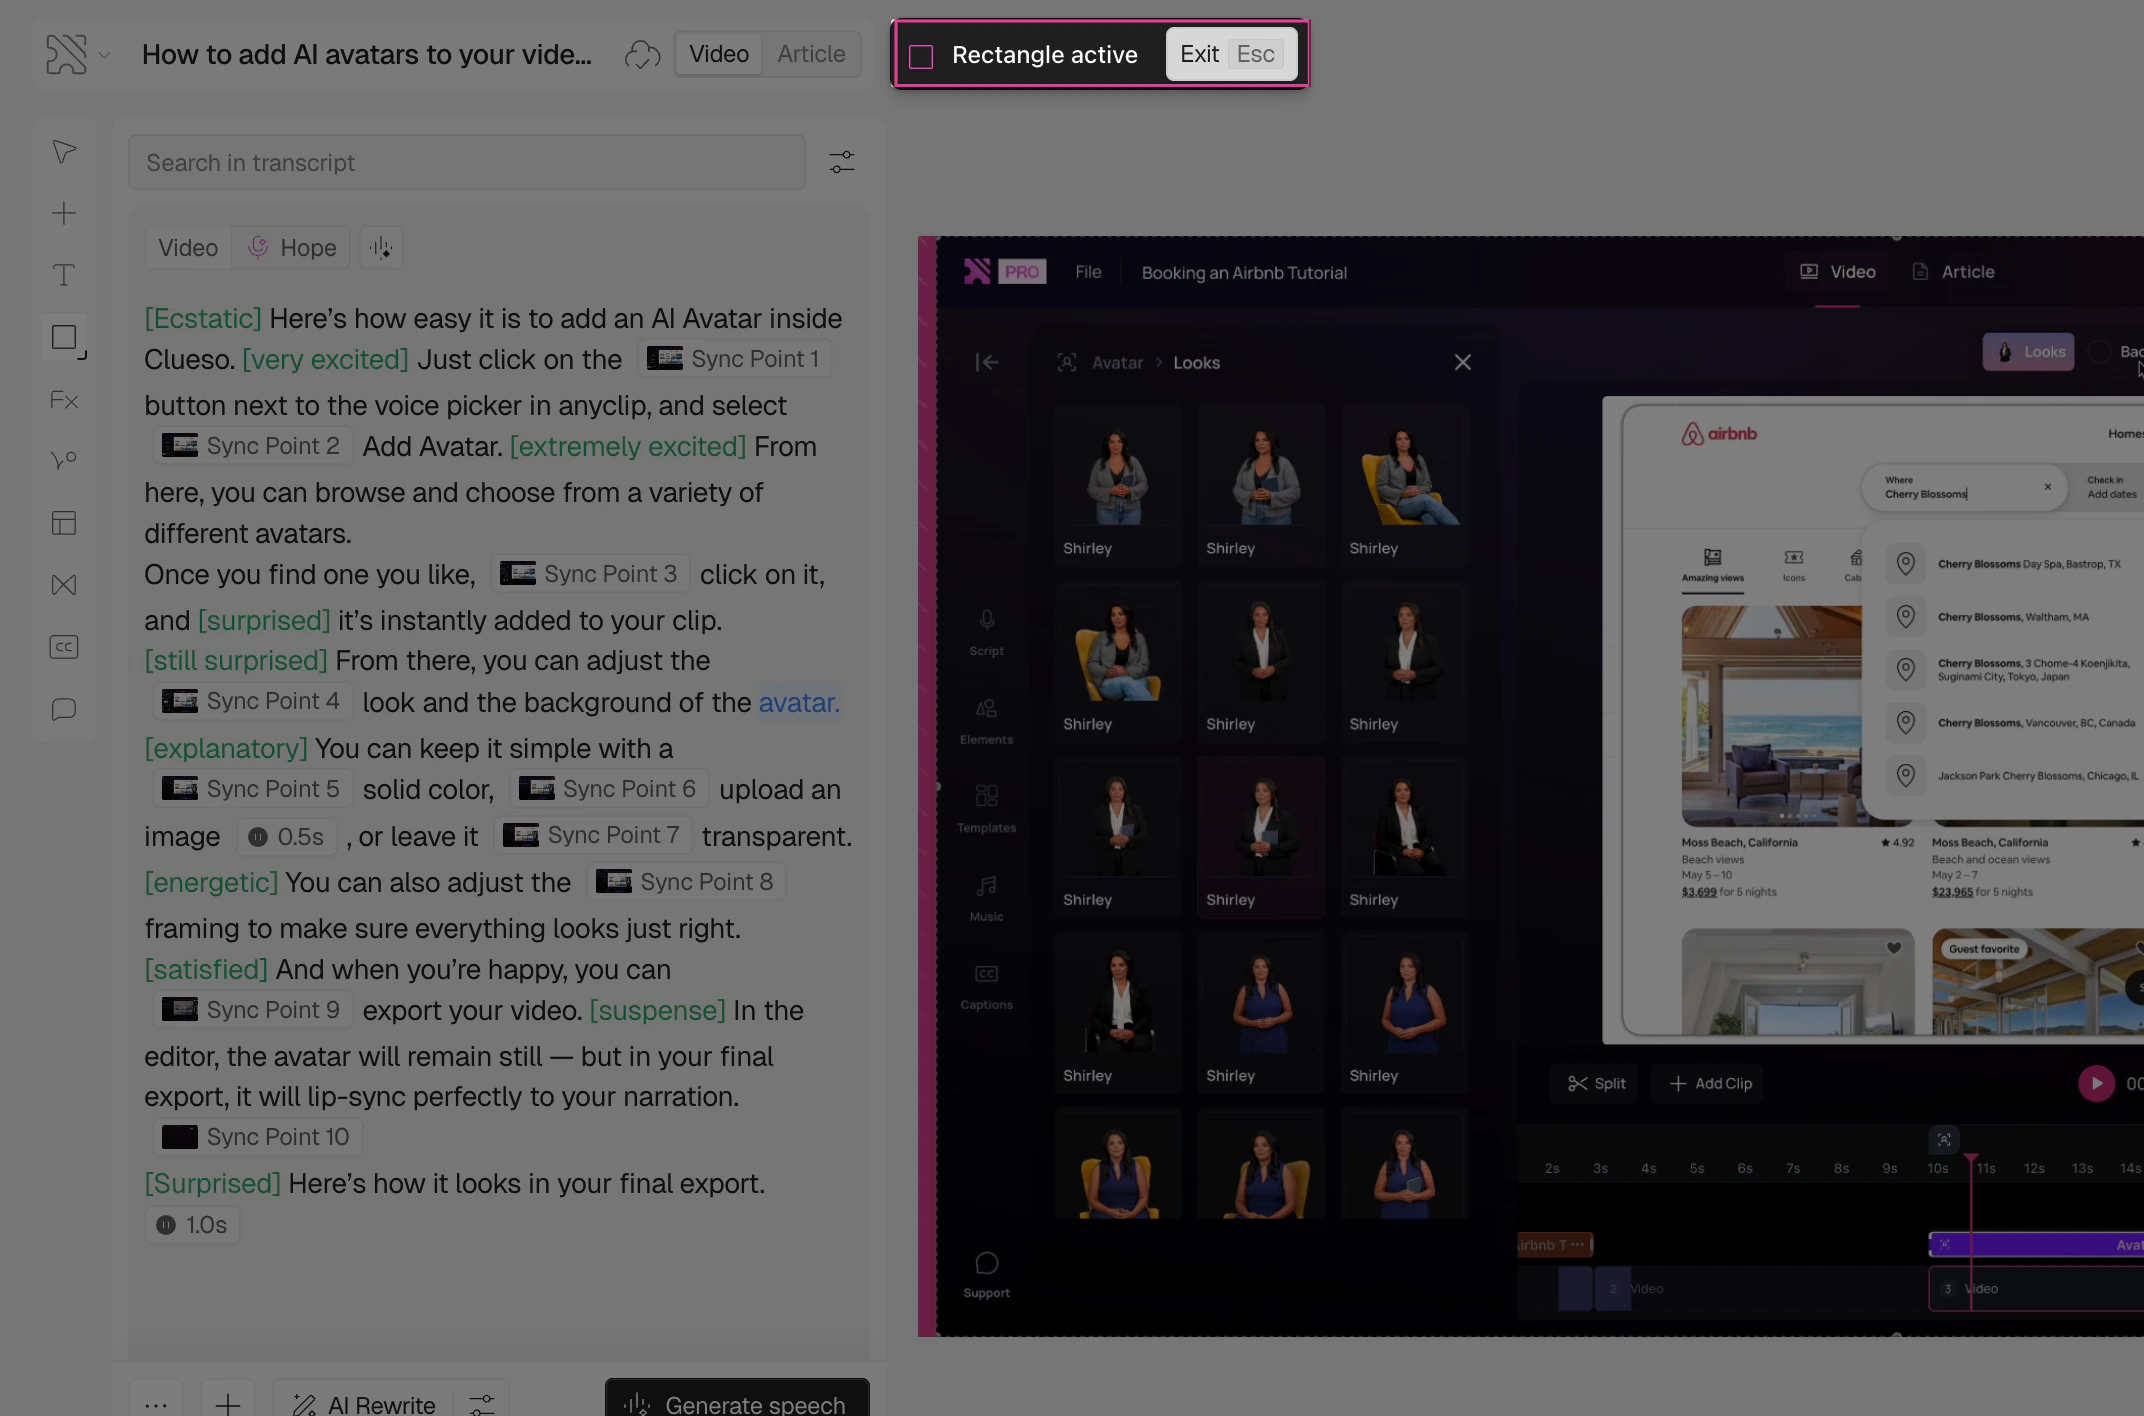
Press **R** on your keyboard to activate the rectangle tool. Your cursor will update and the rectangle tool will be highlighted at the top of the screen.
Click and drag on the canvas to draw your rectangle.
## Customizing a Rectangle
Click on the rectangle on the canvas to select it. The right panel will show two tabs — **Properties** and **Animation**.
Under the **Properties** tab, adjust the following:
**Layout**
* **X / Y** — position of the rectangle on the canvas
* **W / H** — width and height of the rectangle
**Orientation**
* Adjust the rotation angle of the rectangle
**Appearance**
* Set the **corner radius** (%) to round the corners of the rectangle
**Fill**
* Set the **fill color** and **opacity** (%) — lower the opacity to make the rectangle transparent, useful for highlighting content underneath
**Stroke**
* Set the **stroke width** and **stroke color** to add or customize the border of the rectangle
### Using the keyboard shortcut
Press **R** on your keyboard to activate the rectangle tool. Your cursor will update and the rectangle tool will be highlighted at the top of the screen.
Click and drag on the canvas to draw your rectangle.
## Customizing a Rectangle
Click on the rectangle on the canvas to select it. The right panel will show two tabs — **Properties** and **Animation**.
Under the **Properties** tab, adjust the following:
**Layout**
* **X / Y** — position of the rectangle on the canvas
* **W / H** — width and height of the rectangle
**Orientation**
* Adjust the rotation angle of the rectangle
**Appearance**
* Set the **corner radius** (%) to round the corners of the rectangle
**Fill**
* Set the **fill color** and **opacity** (%) — lower the opacity to make the rectangle transparent, useful for highlighting content underneath
**Stroke**
* Set the **stroke width** and **stroke color** to add or customize the border of the rectangle
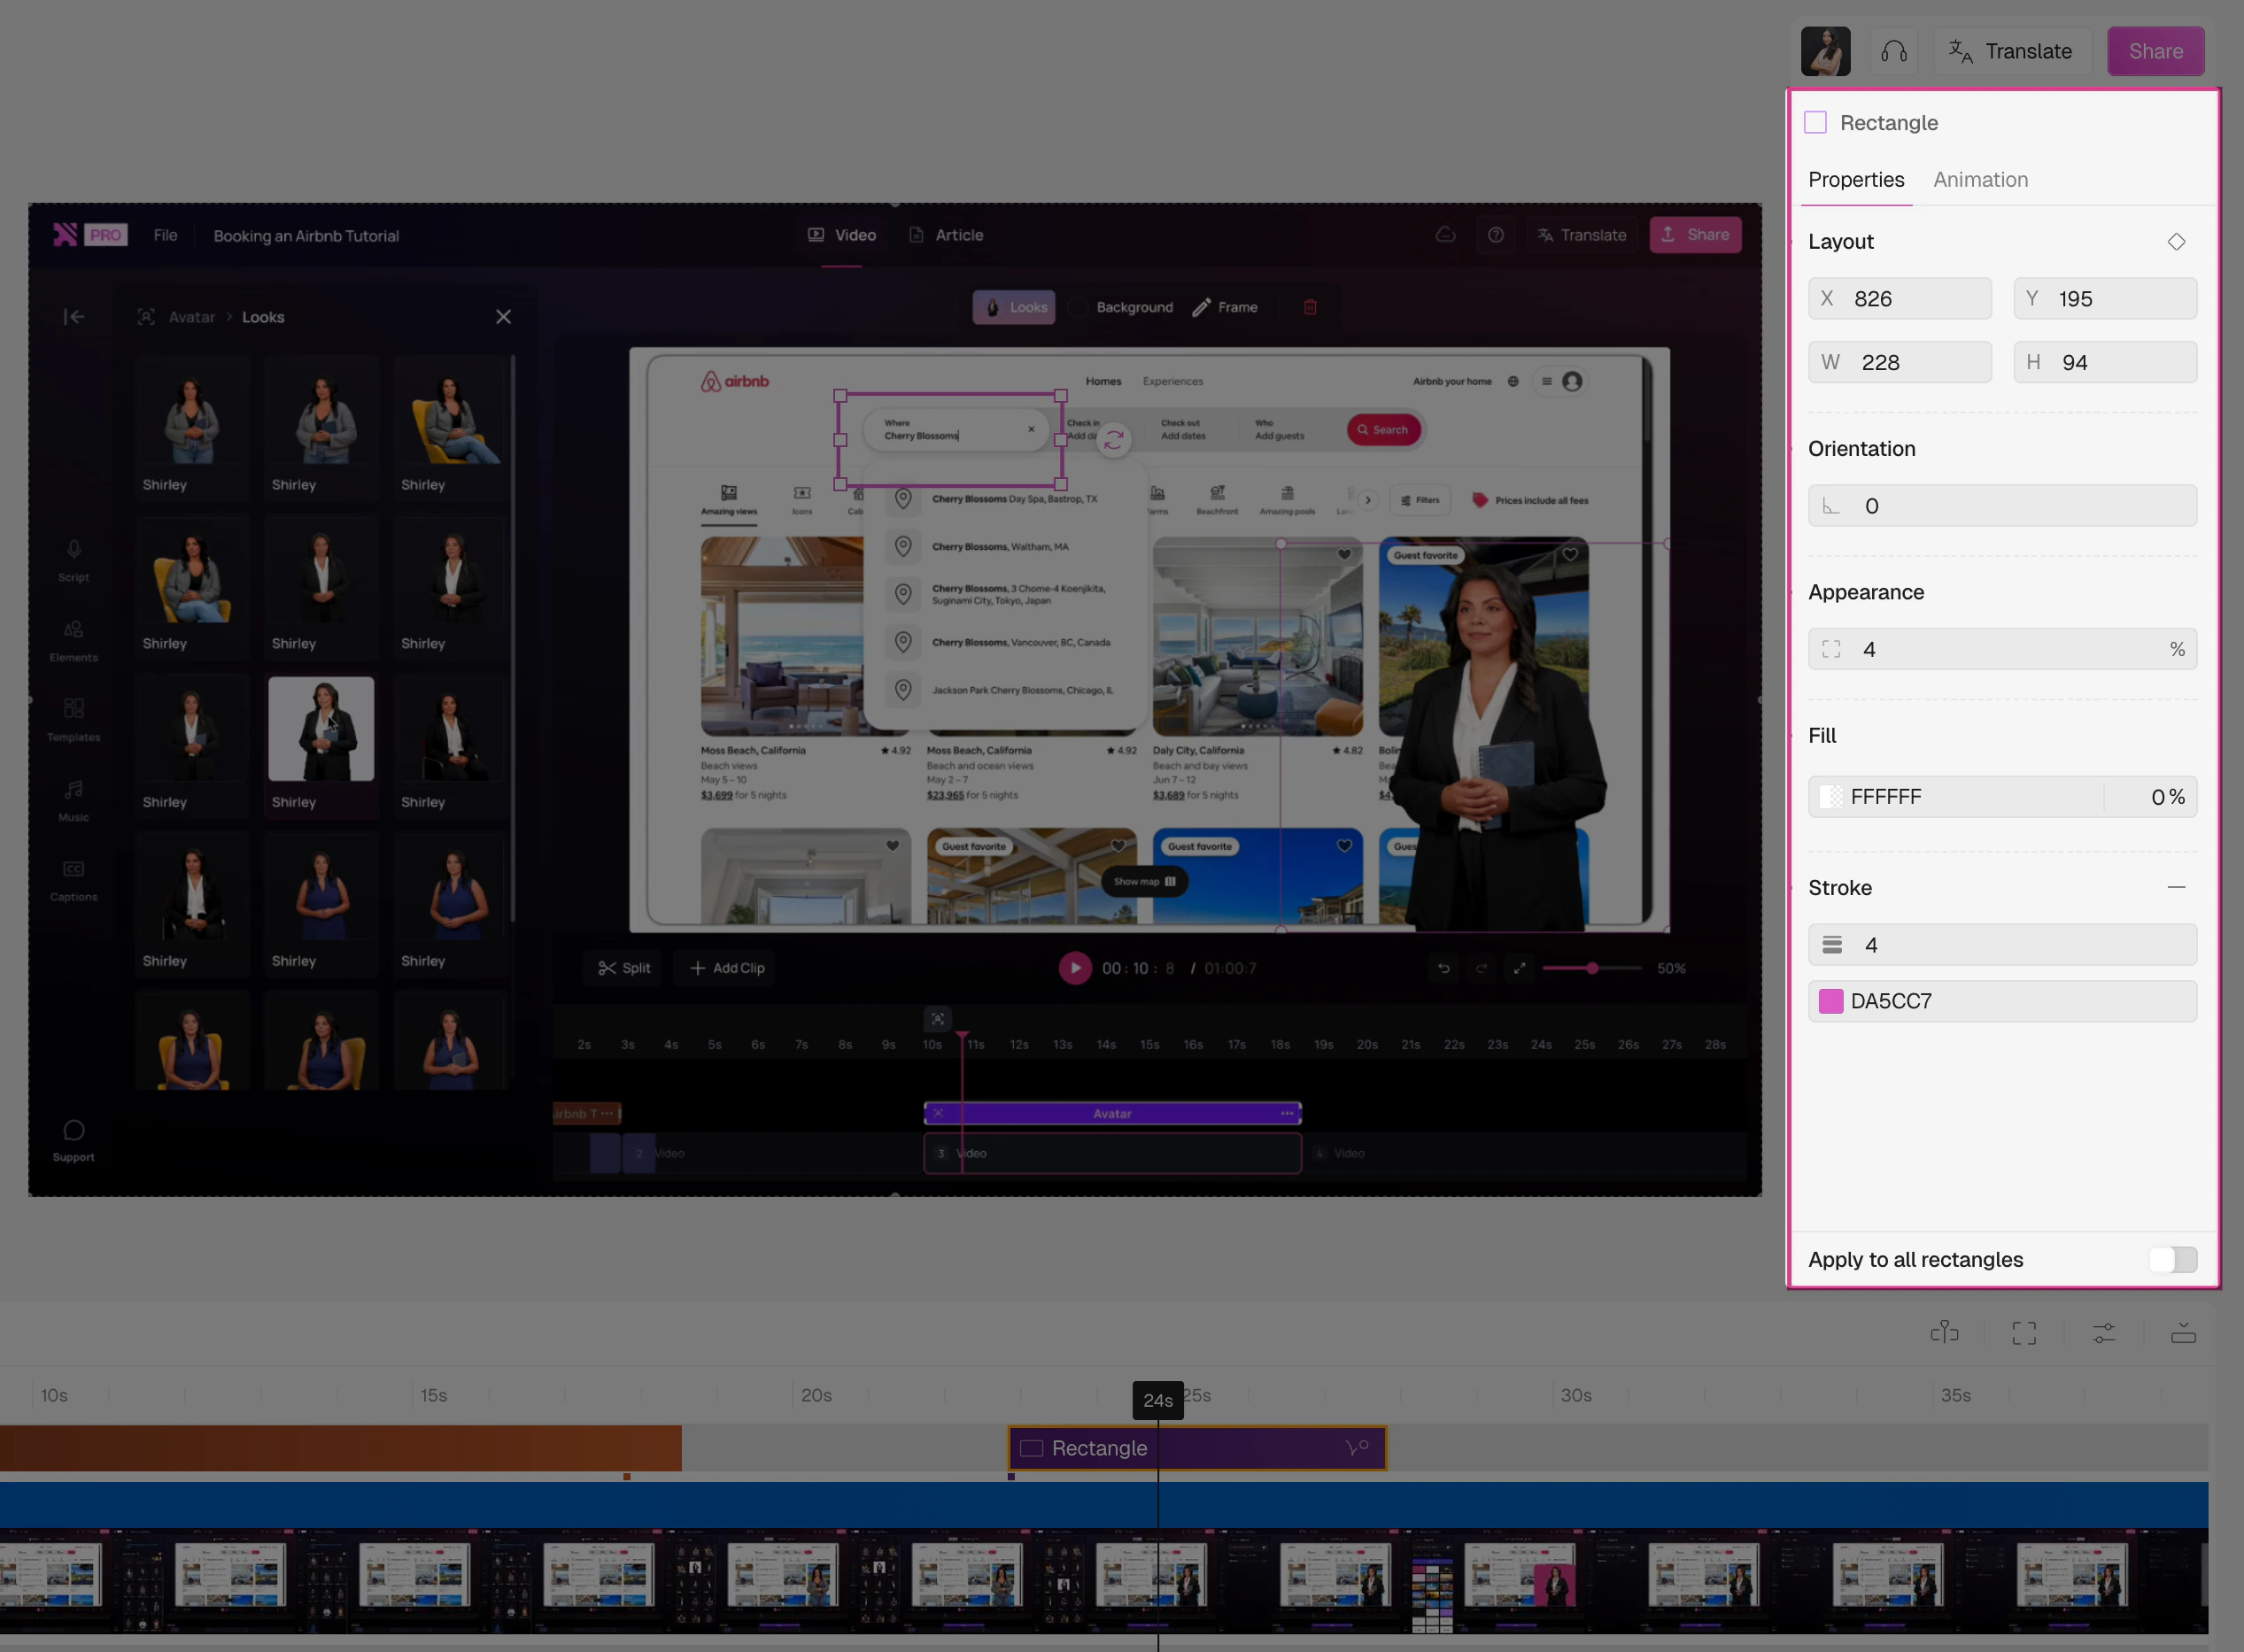 Resize or reposition the rectangle directly on the canvas by dragging its handles or center.
Drag the rectangle element in the timeline to adjust when it appears and how long it stays on screen.
Toggle **Apply to all rectangles** at the bottom of the panel to apply your styling changes across all rectangles in the project.
## Animations
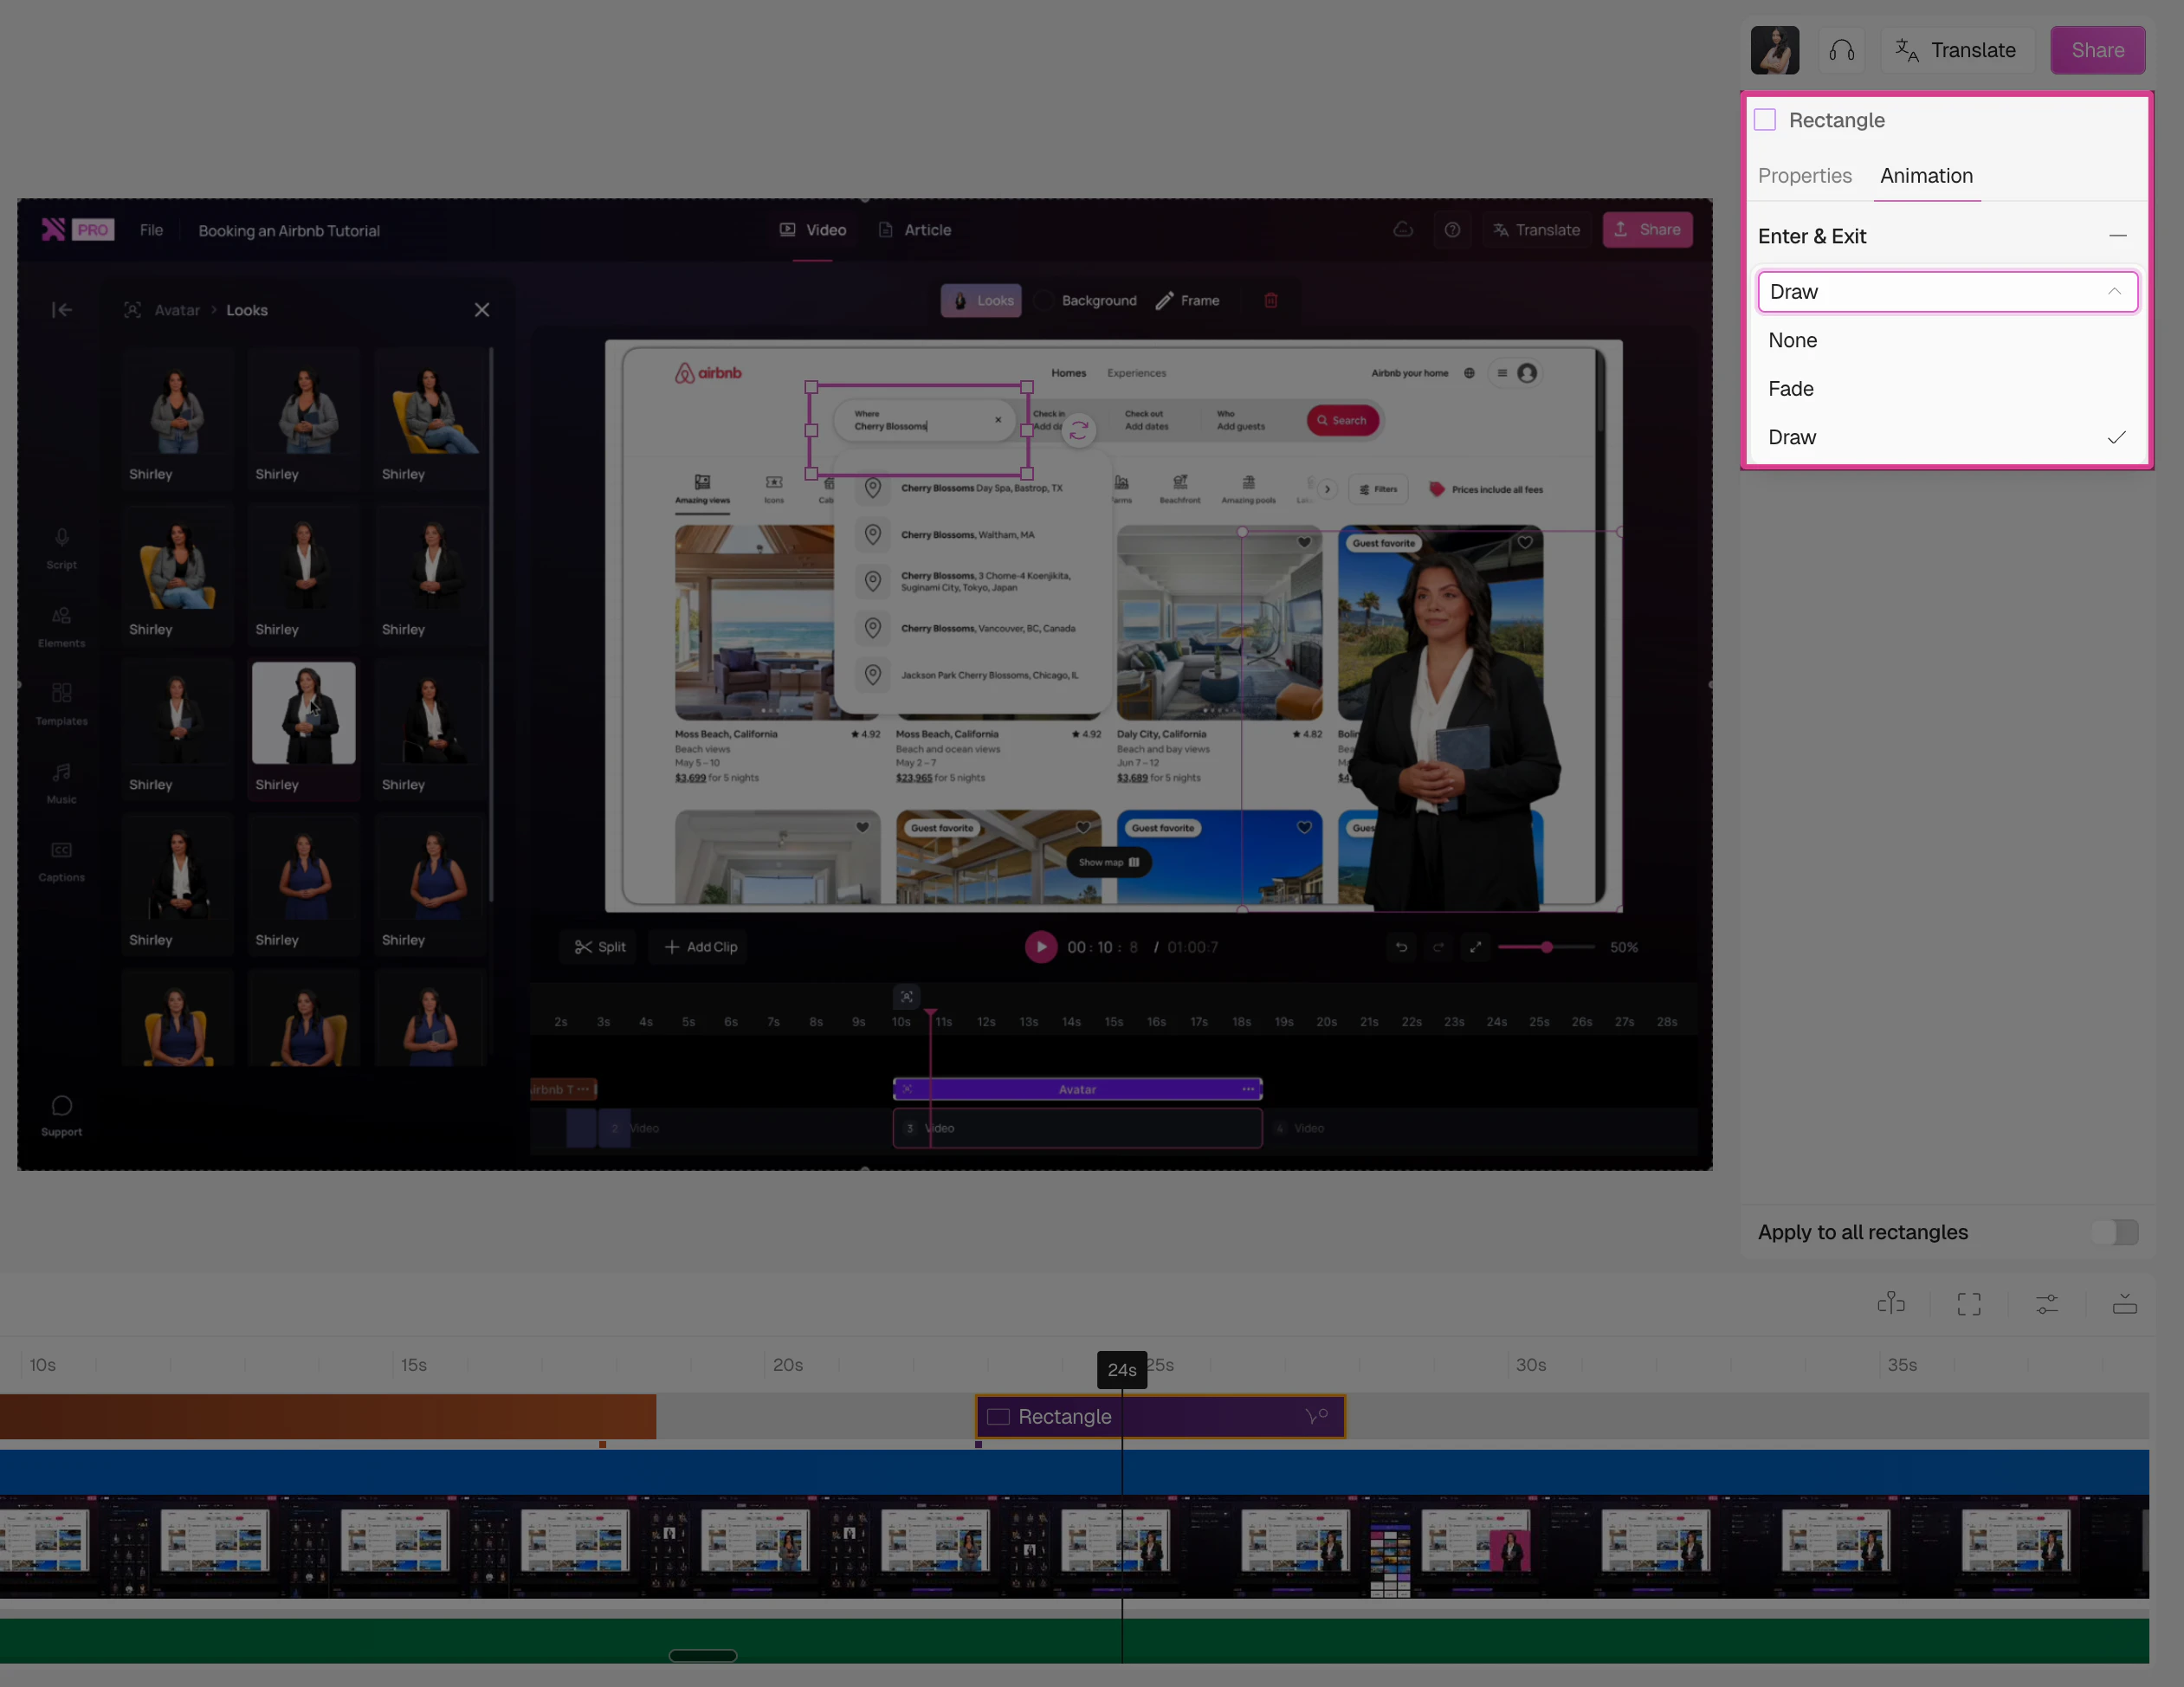
By default, rectangles come with a **Fade** animation — the rectangle fades in and out during playback.
Click on the rectangle and navigate to the **Animation** tab in the right panel.
Choose from the available animation styles:
* **Fade** — the rectangle fades in and out
* **Draw** — the rectangle draws itself on screen
Resize or reposition the rectangle directly on the canvas by dragging its handles or center.
Drag the rectangle element in the timeline to adjust when it appears and how long it stays on screen.
Toggle **Apply to all rectangles** at the bottom of the panel to apply your styling changes across all rectangles in the project.
## Animations
By default, rectangles come with a **Fade** animation — the rectangle fades in and out during playback.
Click on the rectangle and navigate to the **Animation** tab in the right panel.
Choose from the available animation styles:
* **Fade** — the rectangle fades in and out
* **Draw** — the rectangle draws itself on screen
 ## FAQs
Yes, add as many rectangles as you need. Each one can be independently customized by dragging it in the timeline.
Yes, after customizing a rectangle, toggle **Apply to all rectangles** at the bottom of the Properties panel to apply those settings across all rectangles in your project.
Drag the rectangle element in the timeline to adjust when it appears and how long it stays on screen.
## FAQs
Yes, add as many rectangles as you need. Each one can be independently customized by dragging it in the timeline.
Yes, after customizing a rectangle, toggle **Apply to all rectangles** at the bottom of the Properties panel to apply those settings across all rectangles in your project.
Drag the rectangle element in the timeline to adjust when it appears and how long it stays on screen.